Sea Dreaming
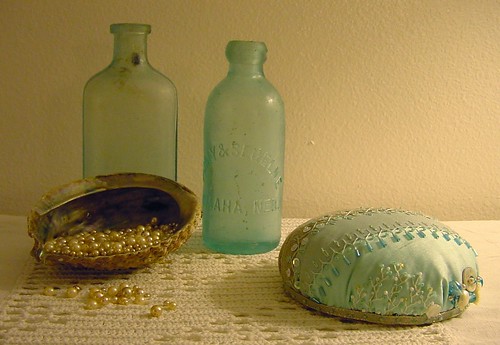
After 6 nights in a row of work, I was thrilled to have last night off! Since I have to go back to work tonight, I stayed on my night schedule and stitched the night away and was able to complete the first of the "sea dreams" pincushions! It goes beautifully with the old aqua glass bottles and the abalone shell of pearls on my bookshelves!
Since I've received a few questions about how to make the pincushions, I thought I'd provide a tutorial. If you make one, I'd love to see a picture!
Since I've received a few questions about how to make the pincushions, I thought I'd provide a tutorial. If you make one, I'd love to see a picture!
CRAZY QUILT CD PINCUSHION TUTORIAL
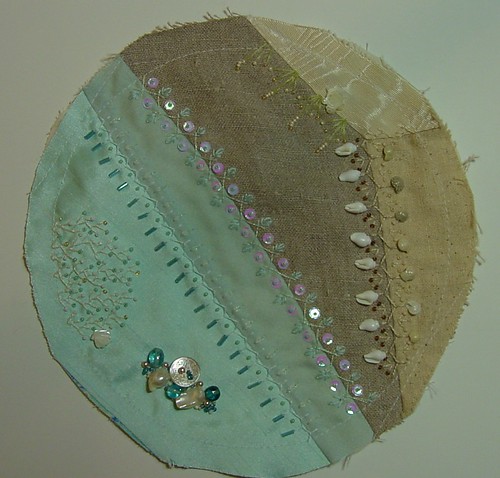
Step 1 ~ piece a block about 9" in diameter. Baste a seam 1/2" to 1" from the edge, all the way around. I'm finding that I end up turning about 3/4" to 1" under when I assemble this, so don't embellish any closer to the edge than that.
Step 2 ~ Embellish your block!
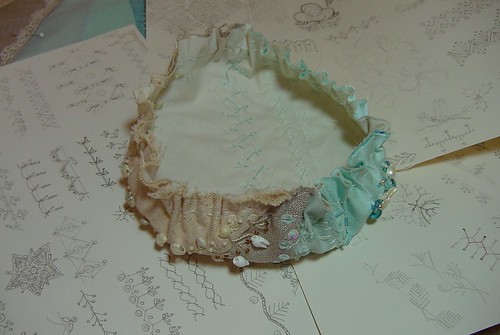
Step 3 ~ With strong nylon thread (I used size D Belding Corticelli nylon beading thread), sew 1/8" long running stitches all around the block. This will be used to gather the block, so don't tie it off yet!
Step 4 ~ Pull up the gathering stitch until the sides are raised about 1 to 1 1/2".
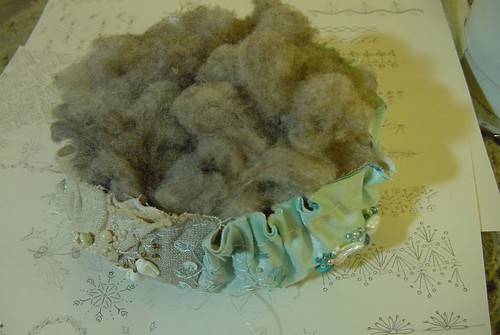
Step 5 ~ Place your stuffing in the center. I used clean washed wool ~ leftovers from my spinning projects, but polyfil would work just as well. Use lots, you want it to be fairly firm!
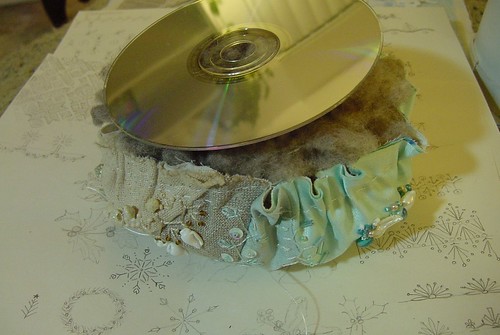
Step 6 ~ place an old CD you no longer need on top of the filling and push it down, tucking in the filling as you pull up the gathering thread.
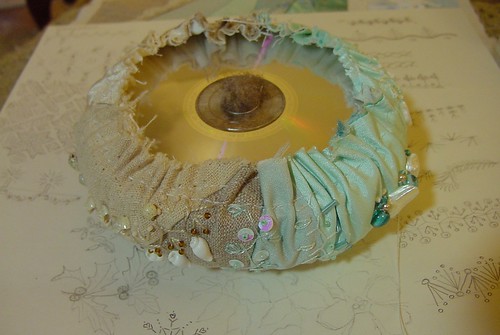
Step 7 ~ If needed you can use a pencil or knitting needle to push more stuffing through the center hole if you need. Spread the gathers out evenly and snug up the gathering thread and tie it off. Don't cut the long end as you can use it to begin the next step.
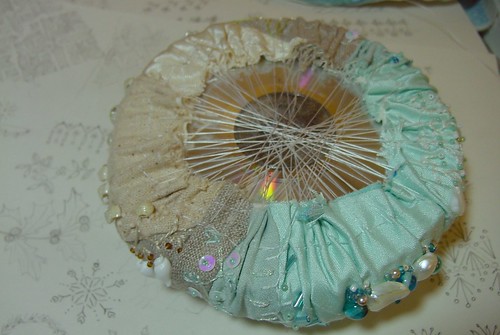
Step 8 ~ Using more of the strong nylon thread, work from one side to the other and stitch the top tight over the CD. This step pulls the fabric snug around the stuffing and helps to keep it in place. Continue until you've pulled the entire top tight. Tie off your thread and cut.
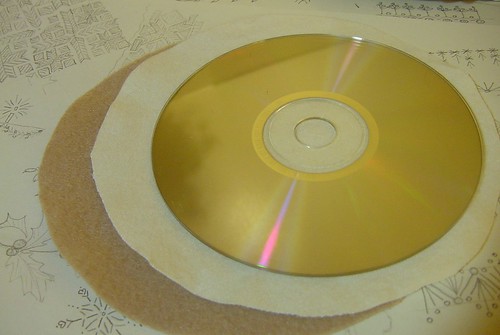
Step 9 ~ Prepare the bottom of the pincushion. Cut a circle of felt about 3/4" to 1" larger than the CD. Because the felt I used was thin and somewhat transparent, I lined it with a circle of flannel. Plain muslin would work just as well. Even interfacing would work well for this if needed. Place the felt and lining together and treat as one piece.
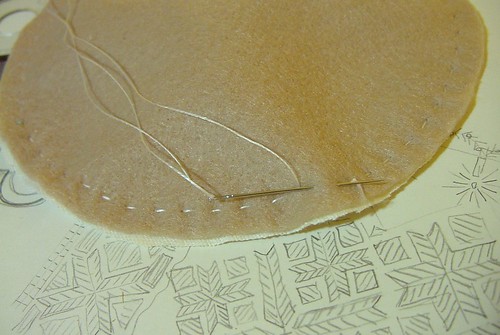
Step 10 ~ Sew a gathering stitch seam around the circle of felt (using 1/8th inch long stitches about 1/4" from the edge of the felt.

Step 11~ place 2nd CD in circle of felt and pull up the gathering stitch.
Step 12 ~ Sew across the felt to pull it tight around the CD just as you did for the top of the pincushion.
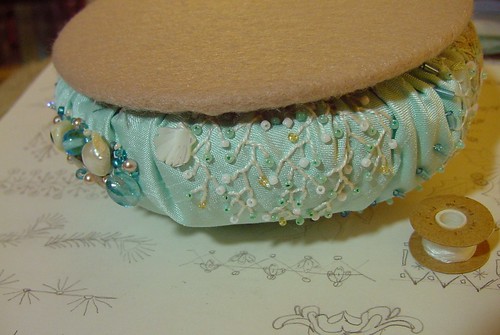
Step 13 ~ Place the bottom piece on the underside of the pincushion with the gathering and tightening stitches places together.

Step 14 ~ With strong thread, sew the top and bottom pieces together using a whip stitch or a blanket stitch. I used a whip stitch on this as I knew I was going to cover the seam.
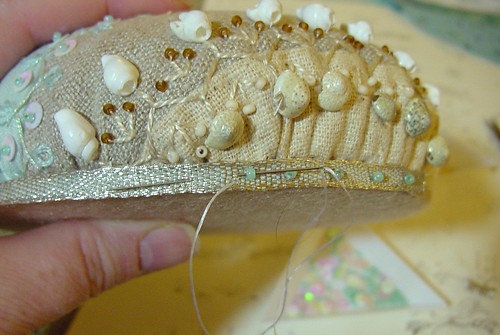
Step 15 ~ Place trim around the bottom edge and sew it to the felt base using a backstitch. I added a bead with each backstitch to accent it. Turn under the end of the trim and blind stitch it down when you get to the end. You are done! Your pincushion is now ready to use!

Here is a look at the different sides of mine. On the beach side, there are shells and beach grass.
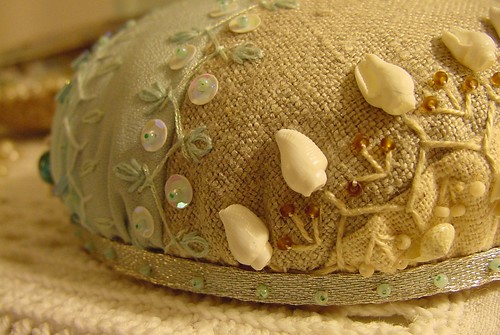
Embellished seams.
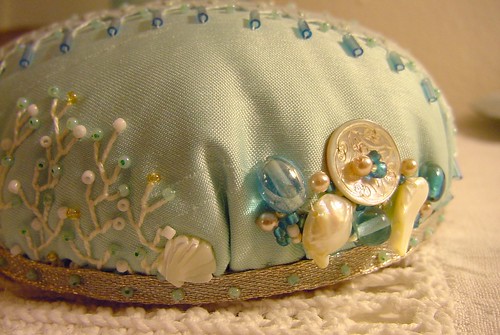
The sea side of the pincushion has a coral like fan and a cluster of pearls and aqua beads.
Blessings and Peace to all!

Comments
http://craftaworld.blogspot.com/
All my best from Ukraine!
Anneliese
Hugs,
Annamaria
Hugs
Kay
Just the kind of project I love and hope to make for Christmas presents this year.
Thanks for sharing it with all of us.
www.theratherbusybee.blogspot.com.au
Groeten uit Nederland.
Here is a link to the first half of the article: http://yesterdaysthimble.com/tutorials/crazy-quilt-pincushions-part-i/
Thank you for creating such beautiful works of art! Your work is an inspiration.
Now I know what to do with old CD's
la balade sur votre blog est un bon moment de bonheur.
douce journée
rose
douce journée
rose
Nedra Jones
Blessings to you!