Organizing the Photo Archive
This is the first of two posts on working with photos and slides. In this first post, I cover how I organize our large archive of family photos dating back to the late 1800s up to the present day. In the next post, I will cover how I scan slides, as well as a little bit about scanning photos and how I organize those digital files and back everything up.
These steps are what have worked well for my sister and I as we work our way through thousands (and thousands!) of photos. I’m sure there are other methods, but this is how we have done it.
First Step, start a calendar of important family dates.

I did not start with a calendar, but as I progressed, I realized I needed to keep track of ‘what happened when’ and having it all in one place that I could refer to without having to open box after box was very helpful. Mine is created in Microsoft Word. If there is interest, I will add a post later about how I created this.
The calendar includes important dates such as births, deaths, marriages, and divorces. I also added the dates of holidays, house moves, trips, and other events to the calendar when I could. To find dates for the calendar, I used the dates found on photos and slides, in saved calendars (I had a few years of my Mom's calendars as well as several years of my own) and Christmas letters, etc. My Mom kept most of the photos in dated albums, which at least got us to the correct year most of the time! As we went, we transferred those occasions to the calendar. Now it is all in one place and I refer to this calendar all the time while sorting photos, as it is very helpful in dealing with unlabeled photos.
Step Two is sorting the photos.

I sort the photos three times: first by decade, then I sort each decade by year, then each year by month. I write the (decade/year/or month) on a piece of copy paper and lay it out on the table or the floor depending on how large the pile of photos is. Then I place photos on the papers according to the photo labels (hopefully!) and if not labeled, using my best guess.
Once I have finished the first sort by decade, I put each decade in a box or large envelope. I deal with one decade at a time. Otherwise, I find it gets too overwhelming. Then I sort each decade into years in the same fashion. Then each year gets put into a photo box marked with the year.


If more than one year is in a box, I add a ¼ page of copy paper labeled with the year that I can easily see. This paper tab is a good spot to write down the known large events such as trips, ages of children, what year they are in school, etc. This is how I kept track of things until I started the calendar. While it might seem repetitive, I found it helpful to have both. Here is a diagram of how I quarter the sheet of paper.

Once the decade is sorted, I work on one year at a time. I do my best to sort chronologically into months. While this may not be a necessary step if you have few photos, for the large number that I am dealing with, I find it very helpful.
Step Three is labeling photos.

My sister and I have discarded many photos because we had no idea who the people in the photos were. An unlabeled photo is worthless if you don’t know who it is.
As I put the sorted photos into the final boxes, I do my best to label them. Here is my formula for labeling.
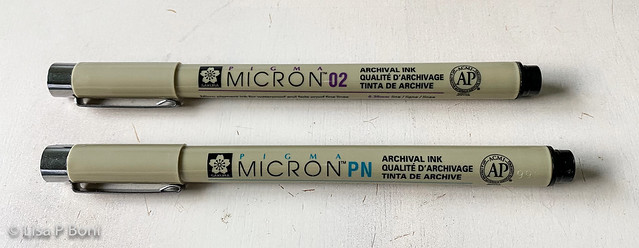
- Use a photo safe archival pen, such as a Pigma Micron Pen. Pencil fades quickly, ball point and most other types of pen bleeds through and then fades or smears, and many modern inks are damaging to photos. I’ve tried the photo pencils, but they don’t write cleanly enough to be easily readable years from now and I found that they smudge, making it hard to read.
- Date the photo with year, month, and day if known
- I use this format, which I also use when scanning and saving photo files on the computer: 2021.02.13 (Year.Month.Day) This allows the photos to easily be sorted chronologically on the computer.
- Names, both first and last.
- Location
- Occasion
A photo label might look like this:
19xx.xx.xx Lillian (Suzi) Fernandez, Princeton, NJ, High School Graduation
When we sorted large groups of photos with the same subject, we sometimes labeled just a couple of photos and then clipped or banded the photos together. This saved time during the initial sort and downsize but still allows for accurate labeling in the future when there is more time.
Some additional tips and suggestions.
- In going through 100s upon 100s of photos, it didn’t take long to figure out that we didn’t care about the photos of scenery, flowers, wildlife, etc. What we loved were the photos of people we knew and especially photos of them in their home, their yard/garden/farm/job, etc. We didn’t care about photos of their friends unless it included family members or the people we all knew. And truthfully, will your grandkids want that photo of your friend cluttering up their closet 50 years from now if you aren’t in it? We found we didn’t even care for photos of just their pets. Those photos are for the people who took them generally. We wanted to see the people. So, we discarded close to 2/3rds of the photos.
Photo Storage
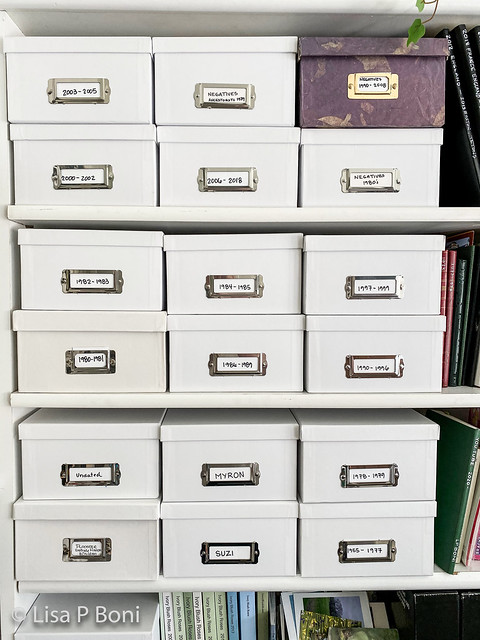
I use photo boxes about the size of a shoebox to keep the photos in. They take up far less space than photo albums and it’s easier to sort and reorganize. The ones I currently like best are from Hobby Lobby (You'll find them near the scrapbooking materials). They have a nice finish inside, a metal label holder and a well-fitting lid. In the past I preferred the Michael’s boxes, but lately the quality has gone down significantly, and I returned the last batch I purchased and went to Hobby Lobby instead. I’ve found that most of the cardboard inserts provided in photo storage boxes are not high enough to be seen above the photos and too many of them are out of cheap cardboard that warps excessively making them worthless. I just recycle them. Instead, as noted above, I quarter a piece of copy paper, writing the year in bold on the upper left. Below it, I write any known events that year including the ages of people who are likely to be in those photos as it helps me date things and is very helpful if I don’t have the calendar list on the computer at hand.

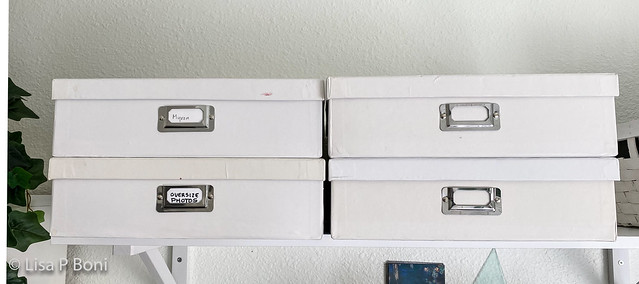
Once I have the photos in the box with dividers in place, I lay any larger photos on top. If there are photos larger than 5"x7", I place them in 12"x13" oversize boxes like those below.


Comments